
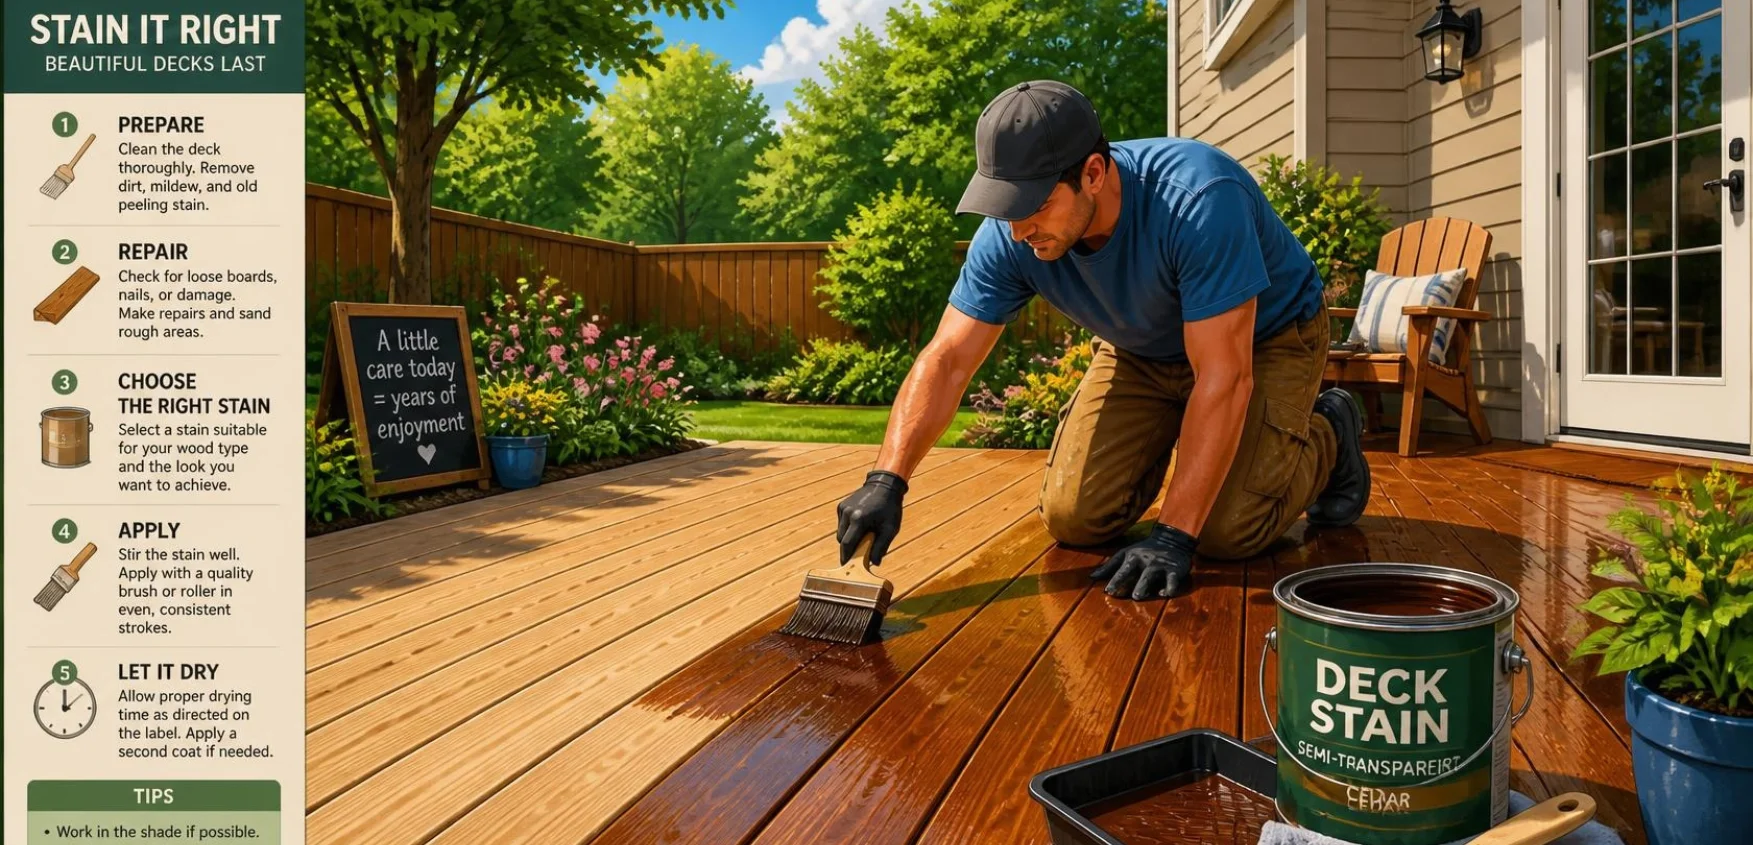
Deck staining protects outdoor wood from moisture, sunlight, and everyday wear while improving its appearance. Good results depend more on preparation and timing than speed. A clean, dry surface gives the stain its best chance to penetrate and wear evenly.
If you’re planning deck staining, start by checking the wood condition and weather forecast. Clean the boards, let them dry, and apply the correct stain in thin, even coats. Most homeowners should also allow adequate drying time before replacing furniture or using the deck.
Deck Staining at a Glance
| Project factor | Practical guidance |
|---|---|
| Best surface condition | Clean, sound, and dry wood |
| Typical drying after washing | About 24–48 hours |
| Common application tools | Brush, roller, stain pad, or sprayer |
| Application method | Work with the wood grain |
| Typical use after staining | Often 24–48 hours, depending on product |
| Common maintenance cycle | Often every 2–3 years |
| Main weather concern | Rain, direct sun, high humidity, or temperature extremes |
| Best rule | Follow the stain manufacturer’s label |
Direct answer: Prepare the deck by cleaning, repairing, and drying the wood before applying stain. Choose a suitable opacity, check the forecast, and work a few boards at a time. Apply thin coats with the grain, avoid puddles, and follow the product’s drying instructions before walking on the surface.
Why Staining a Wood Deck Staining

Exterior wood faces rain, sunlight, dirt, temperature changes, and foot traffic throughout the year. Stain adds color while helping limit moisture and ultraviolet exposure. The protection level varies depending on the product and its amount of pigment.
Deck Staining finishes preserve more visible grain but generally provide less protection from sunlight. Semi-transparent stains balance visible grain with added pigment and protection. Solid stains hide more grain while offering stronger color coverage.
Staining cannot repair rotten boards, failed fasteners, or structural damage. Those problems should be corrected before any finish is applied. Treat stain as part of ongoing deck maintenance rather than a substitute for repairs. Other exterior upkeep, such as solar panel maintenance tips, follows a similar seasonal rhythm.
What You’ll Need Before You Start
Gathering your supplies before cleaning helps keep the project moving. Your exact materials will depend on the existing finish and chosen product. Always read the cleaner and stain labels before starting.
Typical supplies include the following.
- Broom or leaf blower.
- Deck cleaner.
- Garden hose.
- Stiff synthetic brush.
- Sandpaper or sanding equipment.
- Paintbrush.
- Roller or staining pad.
- Extension pole.
- Paint tray or bucket.
- Drop cloths or plastic sheeting.
- Gloves and eye protection.
- Respiratory protection when sanding.
- Exterior wood stain.
Consumer Reports recommends suitable protective equipment when working with stains and sanding dust. Older pressure-treated lumber can require extra precautions during sanding. Homeowners who are unsure about older lumber should consider professional guidance.
How to Do Deck Staining Step by Step
A consistent sequence makes the project easier to manage and reduces common finish problems. Avoid skipping preparation because the stain cannot correct dirt, loose fibers, or trapped moisture. Use the following process as a general framework.
1. Inspect the Deck
Check the boards, railings, stairs, and fasteners before cleaning anything. Look for loose screws, raised nails, splintered boards, rot, and damaged sections. Repairing these issues first creates a safer and more consistent surface.
Pay special attention to areas where water collects after rain. Persistent dampness can point to drainage or structural issues needing attention. Finish those repairs before moving to surface preparation.
2. Clean the Wood Thoroughly
Sweep away leaves, dirt, and loose debris before applying a deck cleaner. Follow the cleaner’s instructions for mixing, dwell time, scrubbing, and rinsing. Sherwin-Williams recommends keeping some cleaners wet while they work and rinsing residue thoroughly.
Previously finished decks may need additional stripping or preparation. Peeling coatings should not simply be covered with another layer. Removing loose material helps the next finish contact sound wood.
3. Let the Deck Dry
Don’t stain wet wood unless the specific product explicitly permits damp-surface application. Many guides recommend allowing approximately 24 to 48 hours after washing or rain. Humidity, shade, temperature, and airflow can extend that period.
A simple water test can also provide useful information. Sprinkle water on the boards and watch what happens. Wood that absorbs droplets is generally more receptive than wood that immediately beads water.
4. Sand Where Needed
Sanding can smooth splinters, remove loose fibers, and improve uneven areas after cleaning. Benjamin Moore recommends sanding prepared wood before staining in its current deck guide. Always match your sanding method to the wood and coating condition.
Wear proper respiratory protection when creating wood dust. Avoid aggressive sanding that changes board profiles or damages fasteners. Vacuum or sweep away all sanding residue before continuing.
5. Choose the Right Stain
The right opacity depends on the appearance and maintenance level you want. Transparent products show the most natural wood character. Semi-transparent products add color while keeping much of the grain visible.
Solid stains create a more uniform colored surface and hide more imperfections. They also behave differently from penetrating transparent finishes as they age. Check the manufacturer’s maintenance instructions before choosing based on color alone.
Test your selected stain in a hidden area before covering the whole surface. Wood species, age, previous treatments, and weathering can change the final appearance. Let the sample dry before judging its color.
6. Check the Weather
Choose a dry period that matches the temperature and humidity limits printed on the product label. Direct midday sun can cause stain to dry too quickly on the surface. Excessive humidity can slow drying and affect the final result.
Rain is another concern because freshly applied coatings need adequate time to set. Don’t rely on a generic weather rule when your product gives specific requirements. The manufacturer’s instructions should control your final scheduling decision.
7. Apply the Stain
Stir the product thoroughly and continue mixing as recommended by its manufacturer. Start with railings, edges, stairs, and difficult areas before covering large horizontal surfaces. Work systematically so you don’t trap yourself in a corner.
Apply the stain with the wood grain and work only several boards at once. Keeping a wet edge reduces noticeable lap marks between sections. Brushes are especially useful for edges, gaps, and back-brushing after roller or sprayer application.
Avoid leaving puddles or heavy areas on the boards. Excess stain may remain tacky or dry unevenly instead of improving protection. Apply only the number of coats specified by the product manufacturer.
8. Let the Finish Dry
Drying time differs by stain formula, weather, wood condition, and application thickness. Many deck guides recommend waiting roughly 24 to 48 hours before normal use. Some products or conditions require a longer cure.
Don’t assume a dry-feeling surface is fully cured. Heavy furniture can mark a finish that isn’t ready for concentrated weight. Follow the product label before returning grills, planters, rugs, or furniture.
Transparent, Semi-Transparent, or Solid Stain?
Choosing opacity is easier when you know what appearance matters most. More pigment usually means greater color coverage and less visible wood grain. Maintenance characteristics also differ among products.
| Stain type | Wood grain visibility | Color coverage | Good fit for |
|---|---|---|---|
| Transparent or clear | Highest | Lowest | Attractive newer wood |
| Semi-transparent | Moderate to high | Moderate | Most natural-looking stained decks |
| Semi-solid | Limited | Stronger | Weathered wood needing more coverage |
| Solid | Lowest | Highest | Older decks with cosmetic variation |
Consumer Reports notes that clear stains provide the least pigment protection. Semi-transparent products add pigment while preserving some grain visibility. Solid stains provide much greater coverage and hide the grain.
Common Deck-Staining Mistakes to Avoid
Poor preparation causes many disappointing finishes. Applying stain over dirt, loose coatings, or damp wood can reduce adhesion and create uneven results. Cleaning and adequate drying should never be treated as optional steps.
Overapplication creates another common problem. A thicker coat does not automatically provide longer protection. Stain left sitting on the surface can create shiny, sticky, or uneven areas.
Working in harsh sunlight can also create visible lap marks. Staining a few complete boards at a time makes the work easier to control. Keep moving while maintaining a wet edge instead of stopping halfway along a board.
How Much Does Professional Deck Staining Cost?
Professional prices vary with deck size, preparation, repairs, railings, location, and product choice. Angi reported a typical professional range of about $550 to $1,250 in its July 2026 U.S. guidance. Larger projects and extensive preparation can cost more.
DIY work may cost less in direct labor, but equipment and preparation still matter. A neglected deck can require cleaners, stripping products, sanding tools, brushes, and protective equipment. Compare the complete project scope rather than only the price of stain.
Hiring a professional can make sense when boards need extensive restoration or previous coatings are failing badly. It may also help when access, stairs, or large rail systems make the work difficult. Get written estimates that explain preparation and materials before comparing bids.
How Often Should You Restain a Deck?
Many wood decks need a fresh finish roughly every two to three years. Sun exposure, foot traffic, climate, product type, and board condition can shorten or extend that schedule. Angi’s 2026 guidance also uses a two-to-three-year range for many decks.
Don’t rely only on the calendar. Watch for faded color, reduced water resistance, worn traffic paths, and exposed wood. A water test can help show whether the surface still resists moisture.
Early maintenance is usually easier than waiting for widespread coating failure. Inspect the deck every spring and after periods of severe weather. Address loose fasteners, splinters, and drainage problems at the same time.
DIY or Hire a Professional?
DIY work suits homeowners who can safely clean, sand, prepare, and coat the entire surface. It also requires enough dry weather to complete every stage properly. Small decks in sound condition are usually more manageable for beginners.
Professional help becomes more attractive when the existing finish needs stripping or the wood needs extensive repairs. Large multilevel decks can also demand more equipment and careful scheduling. Contractors may complete preparation faster because they already own appropriate tools.
For more homeowner projects, Readsbest’s Home Improvement section can support broader maintenance planning. Its coverage also includes exterior topics such as roofing project guidance and solar-panel maintenance. Those subjects pair naturally with seasonal exterior inspections.
Protect the Finish After the Work Is Done
A freshly stained deck still needs routine care. Sweep away leaves and dirt before they hold moisture against the surface. Move planters occasionally so covered areas can dry and receive airflow.
Inspect high-traffic boards and sunny sections during your seasonal maintenance. These locations often show wear sooner than protected railings. Fixing small problems before widespread failure can reduce future preparation work.
Good results come from careful preparation, suitable weather, and patient drying. Follow your stain manufacturer’s directions whenever they differ from general advice. That approach gives your wood the strongest chance of wearing evenly between maintenance cycles.
Frequently Asked Questions About Deck Staining
How long should a deck dry before staining?
A commonly recommended waiting period is 24 to 48 hours after rain or washing. Cool temperatures, shade, or high humidity can increase that time. Always follow the moisture and preparation requirements on your chosen stain.
Should I pressure wash a deck before staining?
Pressure washing can be useful when done carefully and with suitable settings. Excessive pressure can damage wood fibers and create a rough surface. Cleaning with a brush and hose may be enough for less severe buildup.
Should I sand before applying stain?
Sanding is useful for splinters, rough areas, loose fibers, and some previously finished surfaces. Benjamin Moore recommends sanding prepared deck wood in its staining process. The required amount depends on the wood’s condition and prior finish.
Is brushing or rolling better?
A roller covers large flat areas efficiently, while a brush offers greater control around edges and gaps. Many professionals combine methods by rolling or spraying first and then back-brushing. This helps work the product into the wood and even out coverage.
How many coats should I apply?
The answer depends on the exact product rather than one universal rule. Some penetrating stains call for one coat, while other products permit or require additional coats. Read the technical instructions before deciding that more stain will improve performance.
When can I put furniture back on the deck?
Many guides recommend waiting at least 24 to 48 hours before ordinary use. Heavy furniture may require a longer cure depending on the stain and weather. Follow the product label and make sure the finish is no longer tacky.